28.1.22
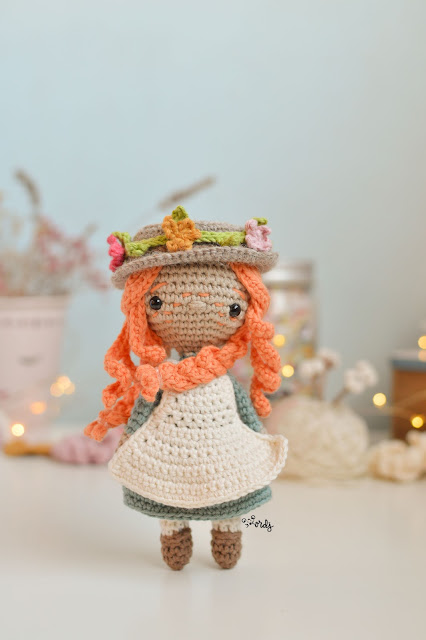
Patrón de Anne with an E amigurumi
21.1.22
Funda Boli llama 🦙 amigurumi | Patrón gratis
Puntos y abreviaturas:
V: Vuelta
A.m.: anillo mágico
P.b.: punto bajo
P.cad.: punto cadena
P.m.a.: punto medio alto
P.a.: punto alto
P.r.: punto raso
Boli llama:
Color blanco roto
V1: a.m. de 8 p.b.(8)
V2 – 29: 1 p.b. en cada punto (8)
Hocico:
V1: a.m. de 6 p.b. (6)
Cerrar el anillo y dejar una hebra larga para coser.
Orejas:
6 p.cad., a partir de la tercera cad. desde el ganchillo
hacer 1 p.a., 1 p.m.a., 1 p.b. y 1 p.r.
Dejar una hebra larga para coser.
Montaje:
Coser las orejas entre las vueltas 2 – 3. Una a cada lado.
Coser el hocico entre las vueltas 5 – 7.
Bordar los ojos y el hocico. Bordar y coser las cuentas
alrededor de la llama.
Y ahora el patrón en
inglés.
Stitches
and abbreviations:
R: round
M.r.: magic
ring
S.c.: single
crochet
Ch.: chain
H.d.c.: half
double crochet
D.c.: double
crochet
sl.st.:
slip stitch
Llama pen:
Off white colour.
R1: 8 s.c.
in a m.r. (8)
R2 – 29: 1 s.c.
around (8)
Snout:
R1: 6 s.c. in a m.r. (6)
Close the
ring and leave a long thread to sew.
Ears:
6 ch.,from
the second ch. from hook 1 d.c., 1 h.d.c., 1 s.c. and 1 sl.st.
Leave a
long thread to sew.
Assembly:
Sew the ears between rounds 2 – 3. One on each side.
Sew the
snout between rounds 5 – 7.
Embroider
the eyes and snout and sew the beads around the llama.
14.1.22
Patrón oso 🐻 y llama 🦙 a crochet - patrón gratis - 3 usos diferentes
V1: a.m. 6
p.b. (6)
V2: *aum.*
x 6 (12)
V3: *1 p.b. y 1 aum.* x 6 (18)
V4: *1 aum. y 2 p.b.* x 6 (24)
V5: *3 p.b. y 1 aum.* x 6 (30)
V6: *2 p.b., 1 aum. y 2 p.b.* x 6 (36)
V7: *5 p.b. y 1 aum.* x 6 (42)
V8: *3 p.b., 1 aum. y 3 p.b.* x 6 (48)
V9: *7 p.b. y 1 aum.* x 6 (54)
V10: *4 p.b., 1 aum. y 4 p.b.* x 6 (60)
V11: *9 p.b. y 1 aum.* x 6 (66)
V12: saltar 1 punto, 6 p.d.a. en el mismo punto, saltar 2
puntos y hacer 20 p.r., saltar 1 punto y hacer la otra oreja con 6 p.d.a.,
saltar 2 puntos y 1 p.r. Cortar y cerrar.
Orejas llama:
V12: oreja: (12 p.cad., a partir del tercer punto desde el
ganchillo hacer 8 p.a., 1 p.m.a. y 1 p.b.)
13 p.r., hacer la otra oreja, y hacer 1 p.r. en el siguiente punto y
alrededor.
Opcional: bordar la cara y flores. Y para usarlo como recoge cables, coser un corchete.
Y ahora el patrón en Inglés (U.S. terms.)
R1: 6 s.c. in a m.r. (6)
R2: *inc.* x 6 (12)
R3: *1 s.c. and 1 inc.* x 6 (18)
R4: *1 inc. and 2 s.c.* x 6 (24)
R5: *3 s.c. and 1 inc.* x 6 (30)
R6: *2 s.c., 1 inc. and 2 s.c.* x 6 (36)
R7: *5 s.c. and 1 inc.* x 6 (42)
R8: *3 s.c., 1 inc. and 3 s.c.* x 6 (48)
R9: *7 s.c. and 1 inc.* x 6 (54)
R10: *4 s.c., 1 inc. and 4 s.c.* x 6 (60)
R11: *9 s.c. and 1 inc.* x 6 (66)
R12: skip1 st., 6 trc in the same st, skip 2 and make 20 sl.st.,skip1 st., 6 trc in the same st, skip 2 and 1 sl.st. Cut and fasten off.
Llama's ears:
R12: ear: (12 ch., from the third ch. from hook 8 d.c., 1 h.d.c. and 1 s.c.) 13 sl.st., make the other ear. and 1 sl.st. around. Cut and fasten off.
Optional: embroider the face and flowers.
Espero que te haya gustado y que disfrutes tejiendo este sencillo patrón y tan útil, al menos en mi caso 😉.Si lo tejes, no te olvides de etiquetarme en las redes para que podamos verlo. Gracias por compartir el post y el vídeo.
¡Hasta el próximo post!


